Heads up! This content is relevant for Clipchamp for personal accounts. Try this link If you're looking for information about Clipchamp for work accounts.
On this page

From soft melodies to up-beat jingles, choosing the right background music can bring your video to life, no matter your genre or aesthetic. But not all music is free to use and share on social media like YouTube. Without having knowledge around royalty-free music, adding copyrighted music to your video may result in demonetization or muted.
The good news is, we've curated a content library full of professional and catchy stock audio that's completely copyright-free so you don't need to worry. Browse through a huge range of music genres like hip-hop, sad, scary, and happy, or search through popular sound effects including whoosh, ping, dings, and explosions.
Explore more about royalty-free music and how to find the perfect background track for your video in Clipchamp.
What is royalty-free music?
Royalty-free music, also known as royalty-free licensing, refers to music you can use on your personal and commercial video content for platforms like YouTube and Instagram without having to pay royalties to the artist. Usually, there are two different royalty-free music categories; paid and free.
Free royalty-free music
Free-to-use royalty-free music means the soundtracks are free, with no payment required. All you have to do is add the soundtrack to your video, save it, and upload it freely to a social media platform like YouTube.
Clipchamp provides you access to thousands of stock audio files from Storyblocks that you can use in your videos for commercial and non-commercial purposes. Explore our free and premium background music tracks and find the perfect fit for your video. You can also find YouTube sound effects in Clipchamp.
Paid royalty-free music
Not all stock music is free to use. Some providers may require you to pay a one-time license fee to give you the right to use the music for personal or commercial use. The music is still royalty-free but not free to add to your videos. If you have a paid subscription plan in Clipchamp, you'll have access to all royalty-free stock media and audio.
Why should you use copyright-free music?
Social media platforms like YouTube, Instagram, and Facebook require creators to follow specific music policies. If these policies aren't met by posting a video that includes non-copyright music, your video can be muted, removed, blocked, and even result in a flagged or banned account.
Easily avoid these copyright issues by removing any copyrighted music in your video, and replacing it with royalty-free audio tracks. If you have used royalty-free music and your video still receives a copyright infringement warning, look at our help article for more information.
How to use royalty-free music in Clipchamp
Step 1. Import videos or select stock footage
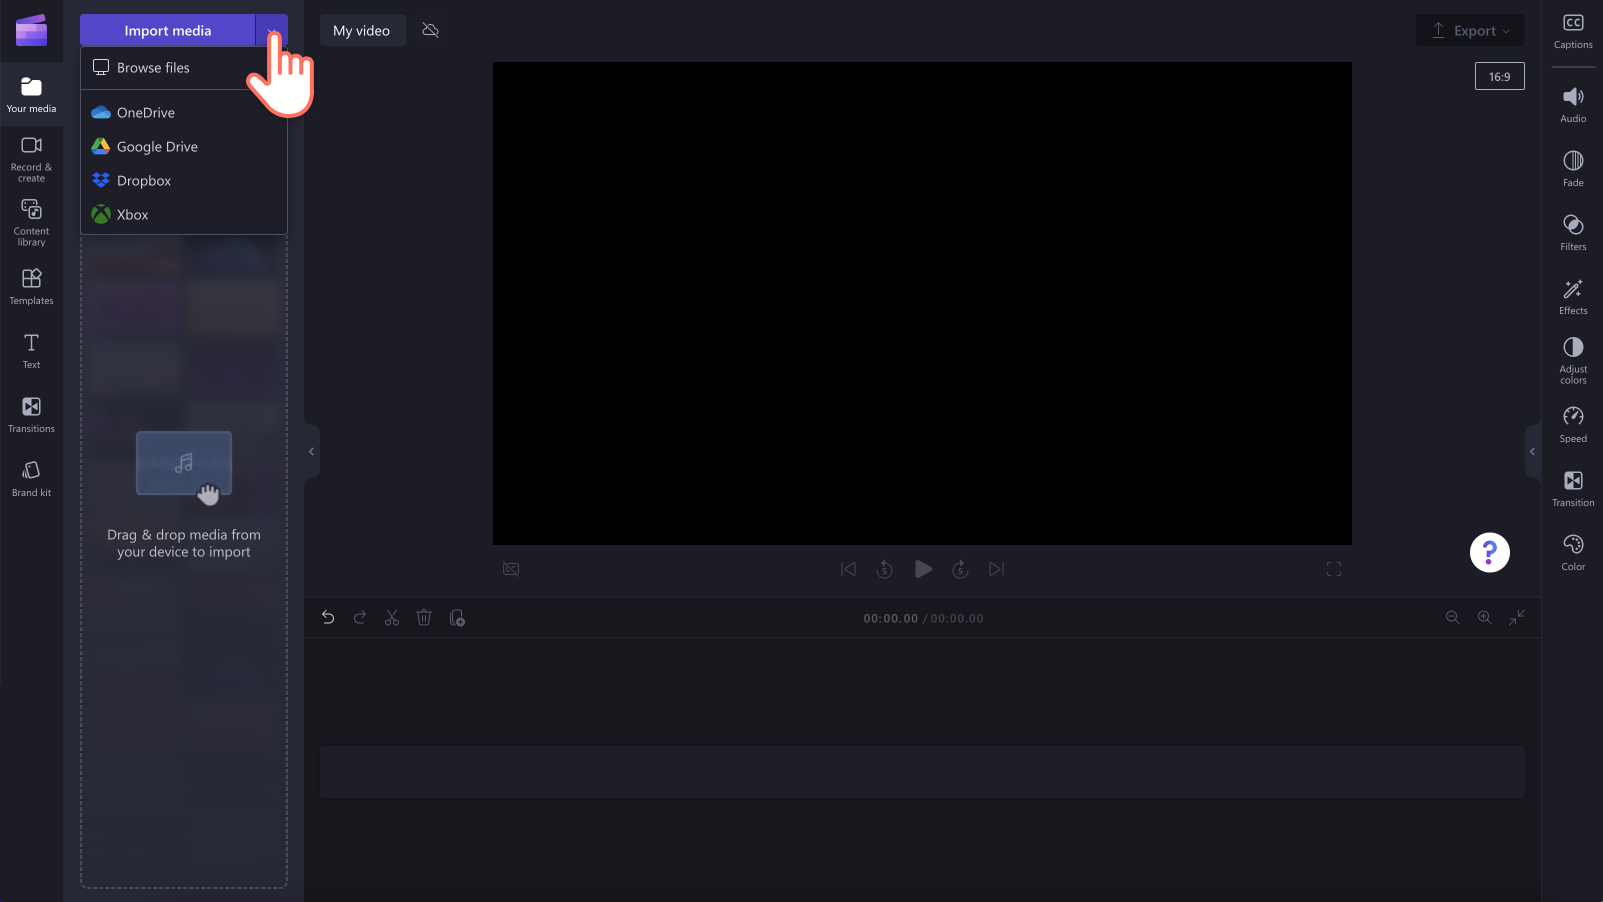
To use royalty-free music, create a new video. Import your own videos, photos, and audio, click on the import media button in the your media tab on the toolbar to browse your computer files, or connect your OneDrive.
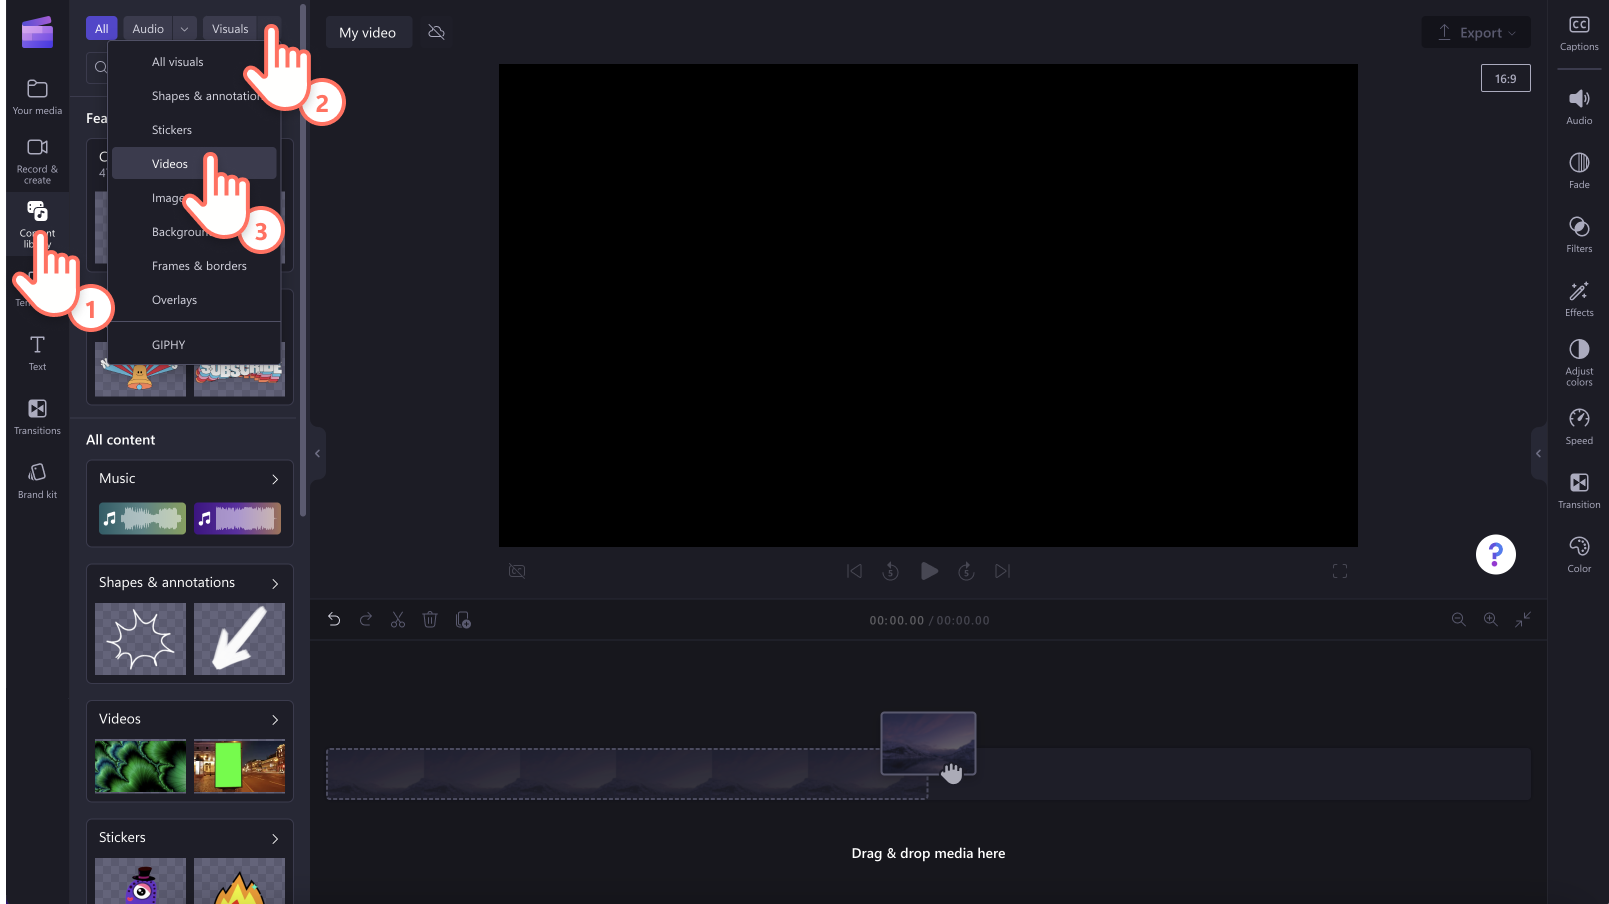
You can also use free stock media like video clips, video backgrounds, and stock music. Click on the content library tab on the toolbar and click on the visuals drop down arrow, then videos. Search through the different stock categories using the search bar as well.
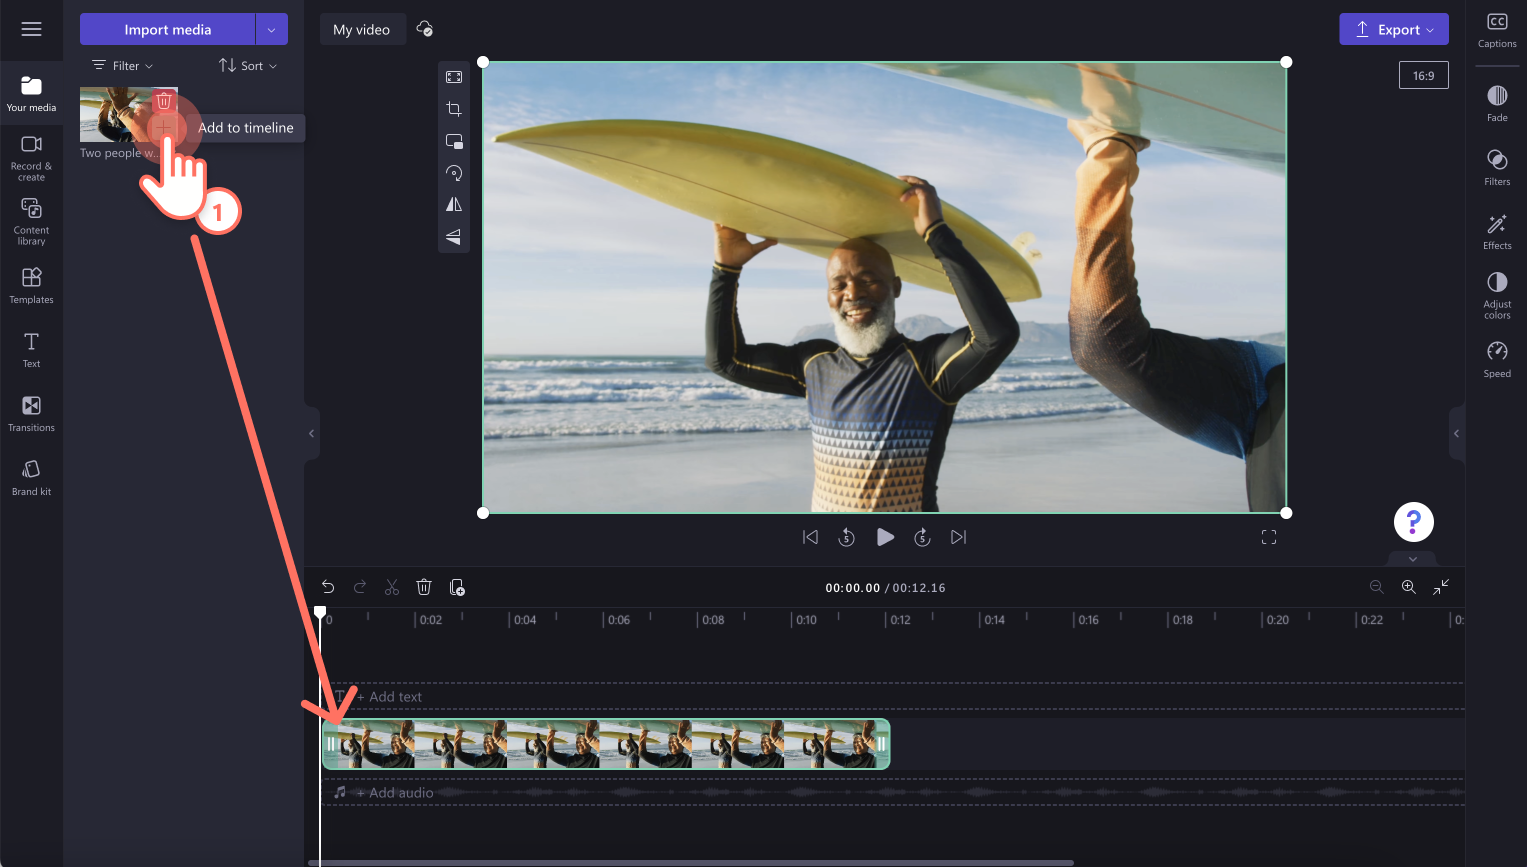
Drag and drop your video onto the timeline.
Step 2. Find the right royalty-free music track
To add stock music and sound effects to your video, click on the content library tab on the toolbar. Next, click on the audio option. Here, you can find a wide range of music and sound effects that are royalty-free for YouTube and other social media platforms.
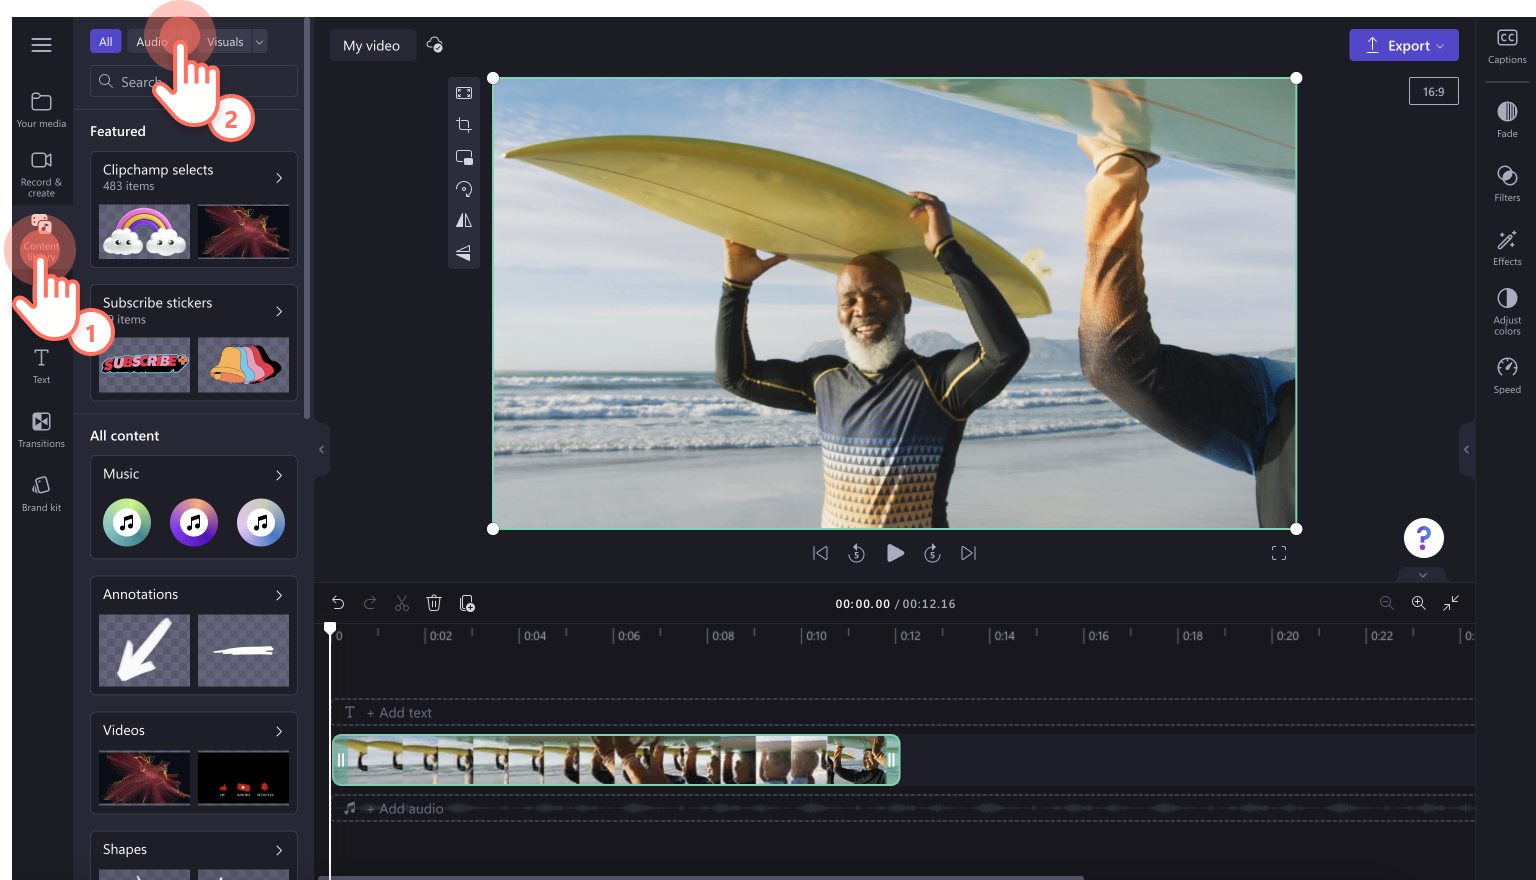
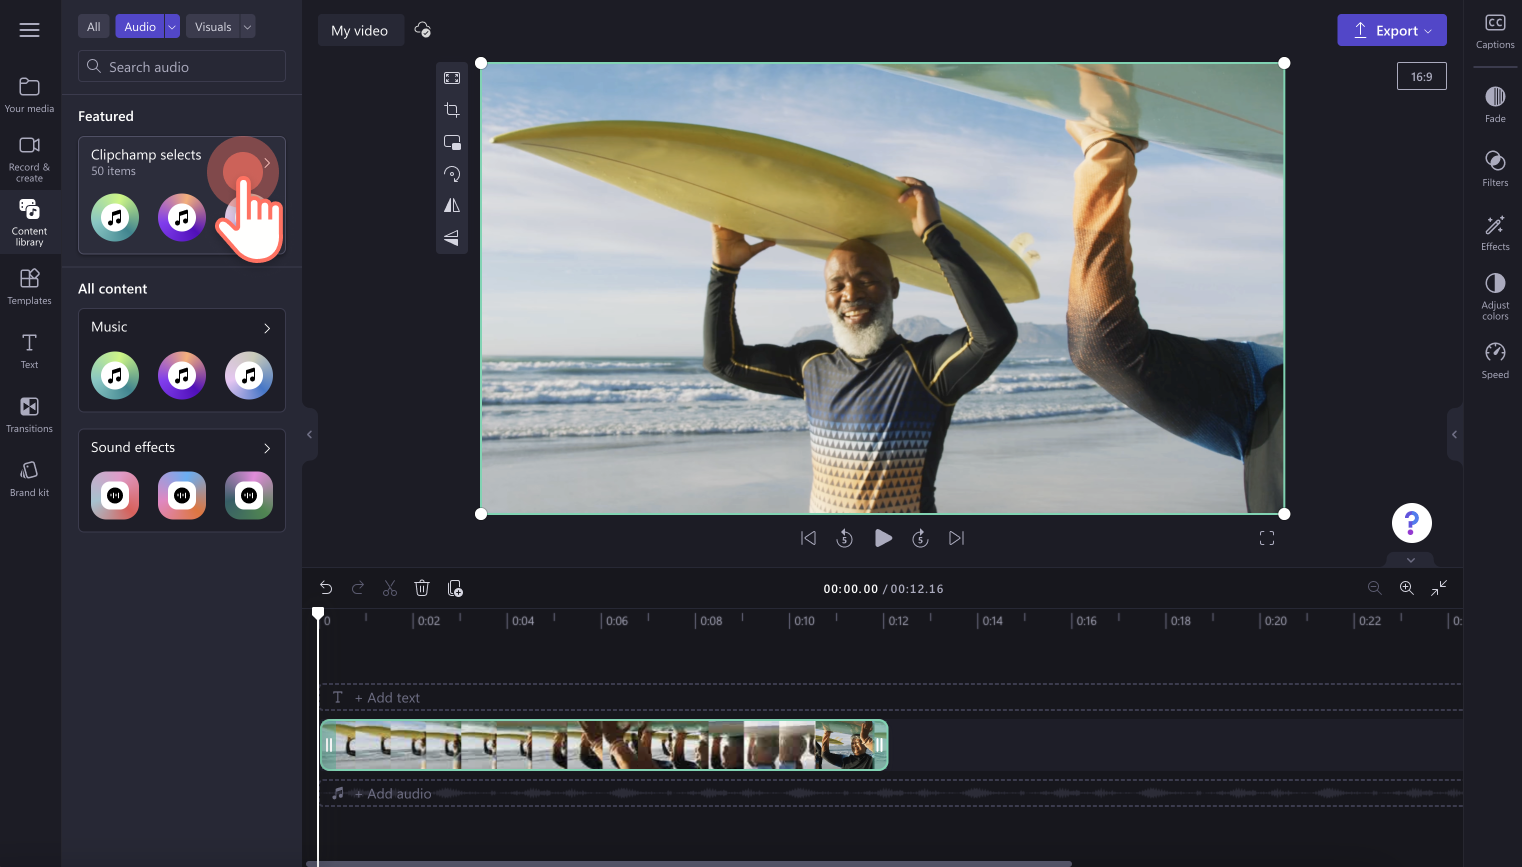
Next, click on an audio category. Select from recommended audio files, all music, or all sound effects.
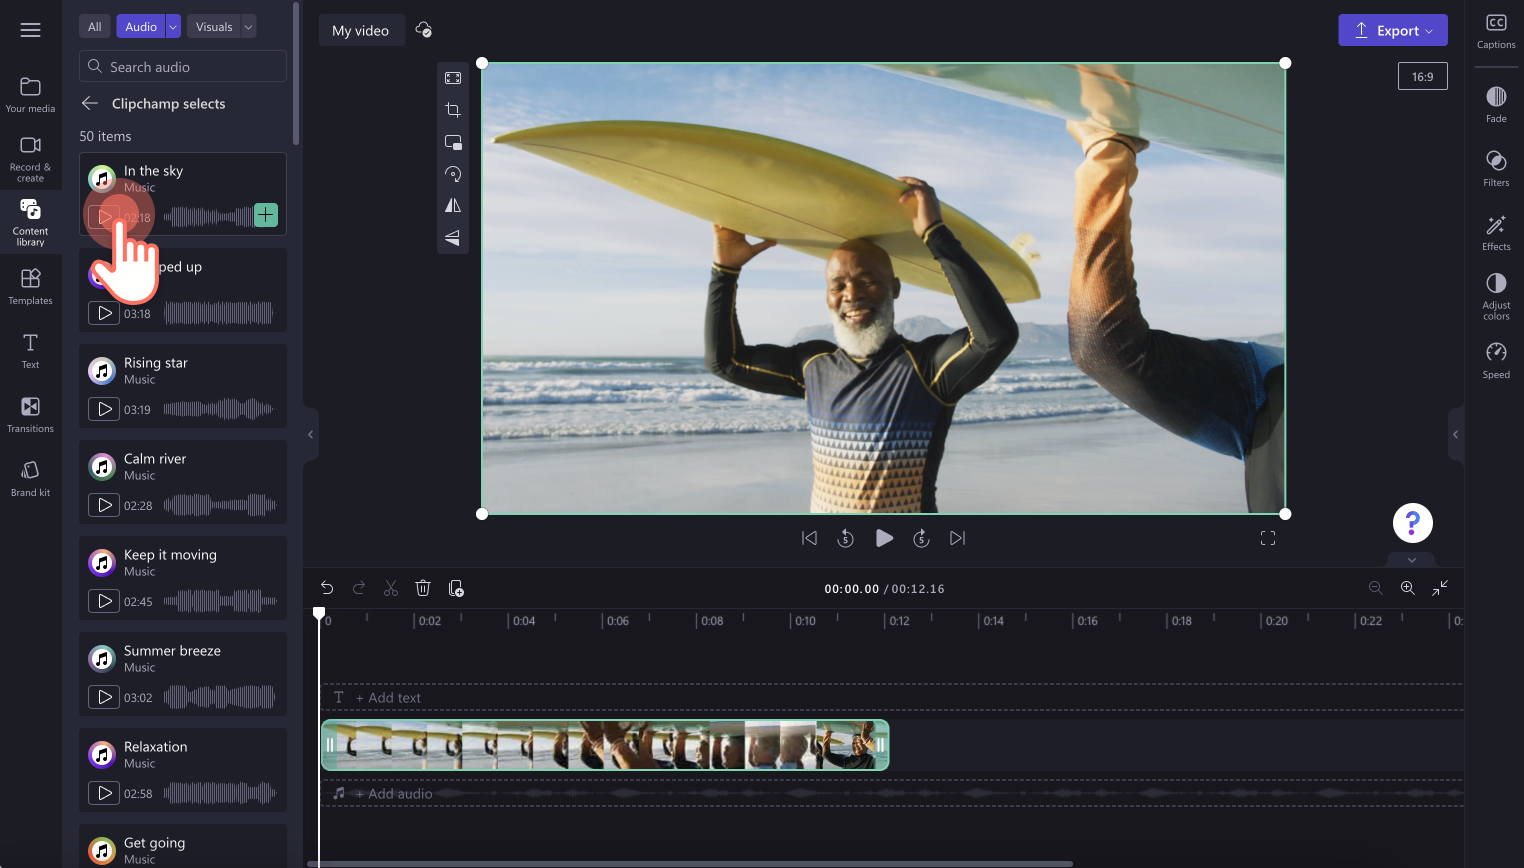
To preview an audio file, click on the play button.
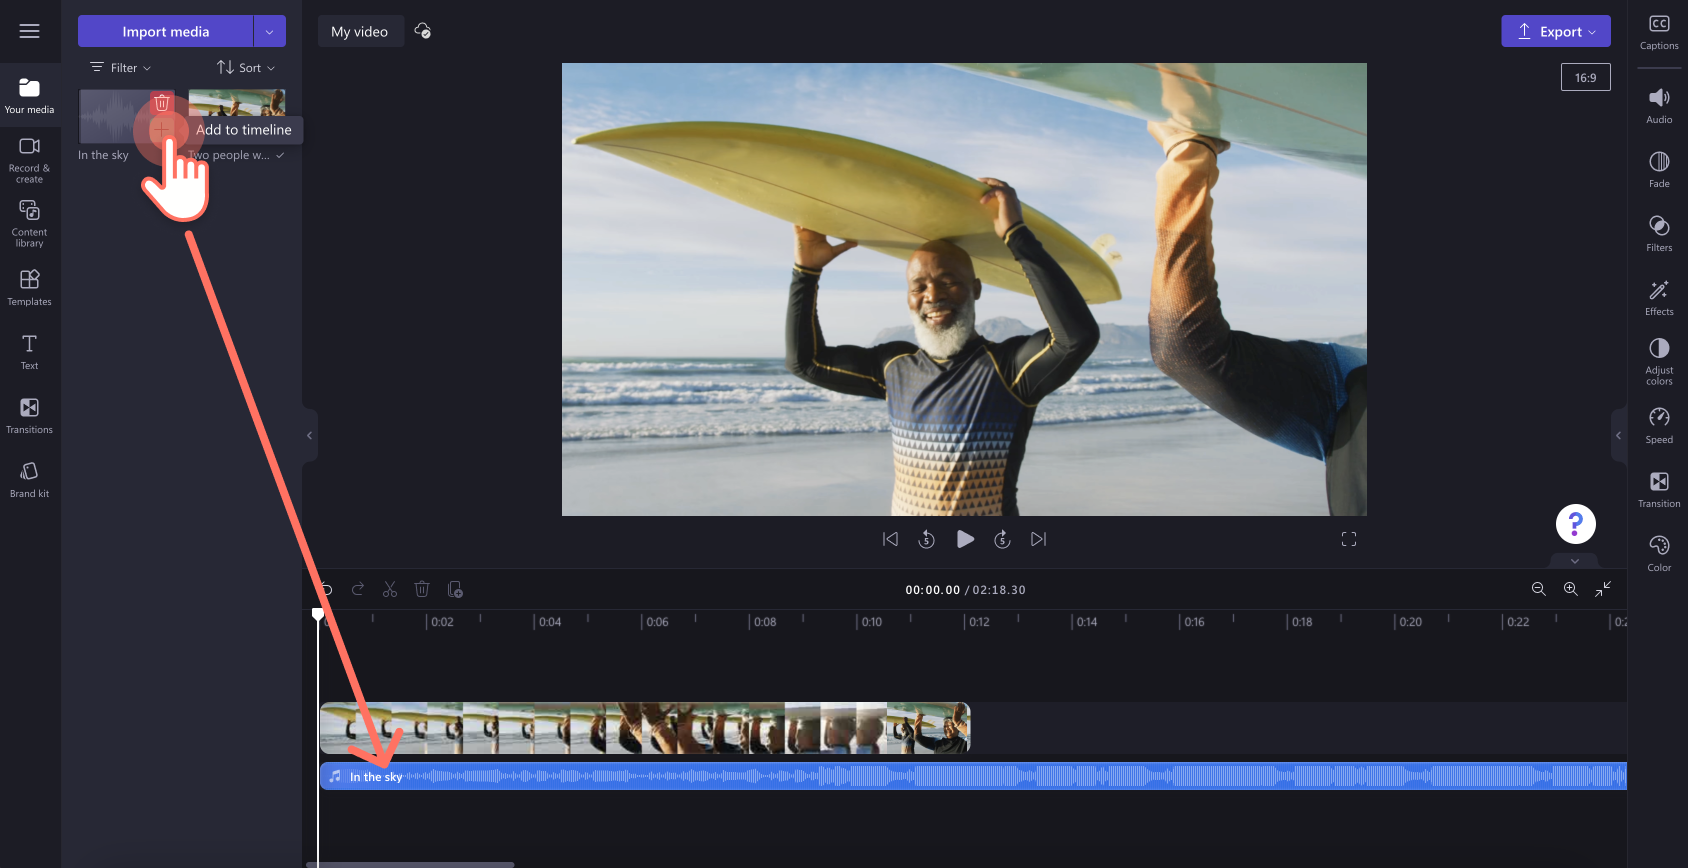
You can also view the audio file in full-screen by clicking on the track. Here, you will be able to see the audio duration and if the asset is paid or free. Click on the add to timeline button to add your audio to the timeline, or click on add to my media button to add your audio to the your media tab.
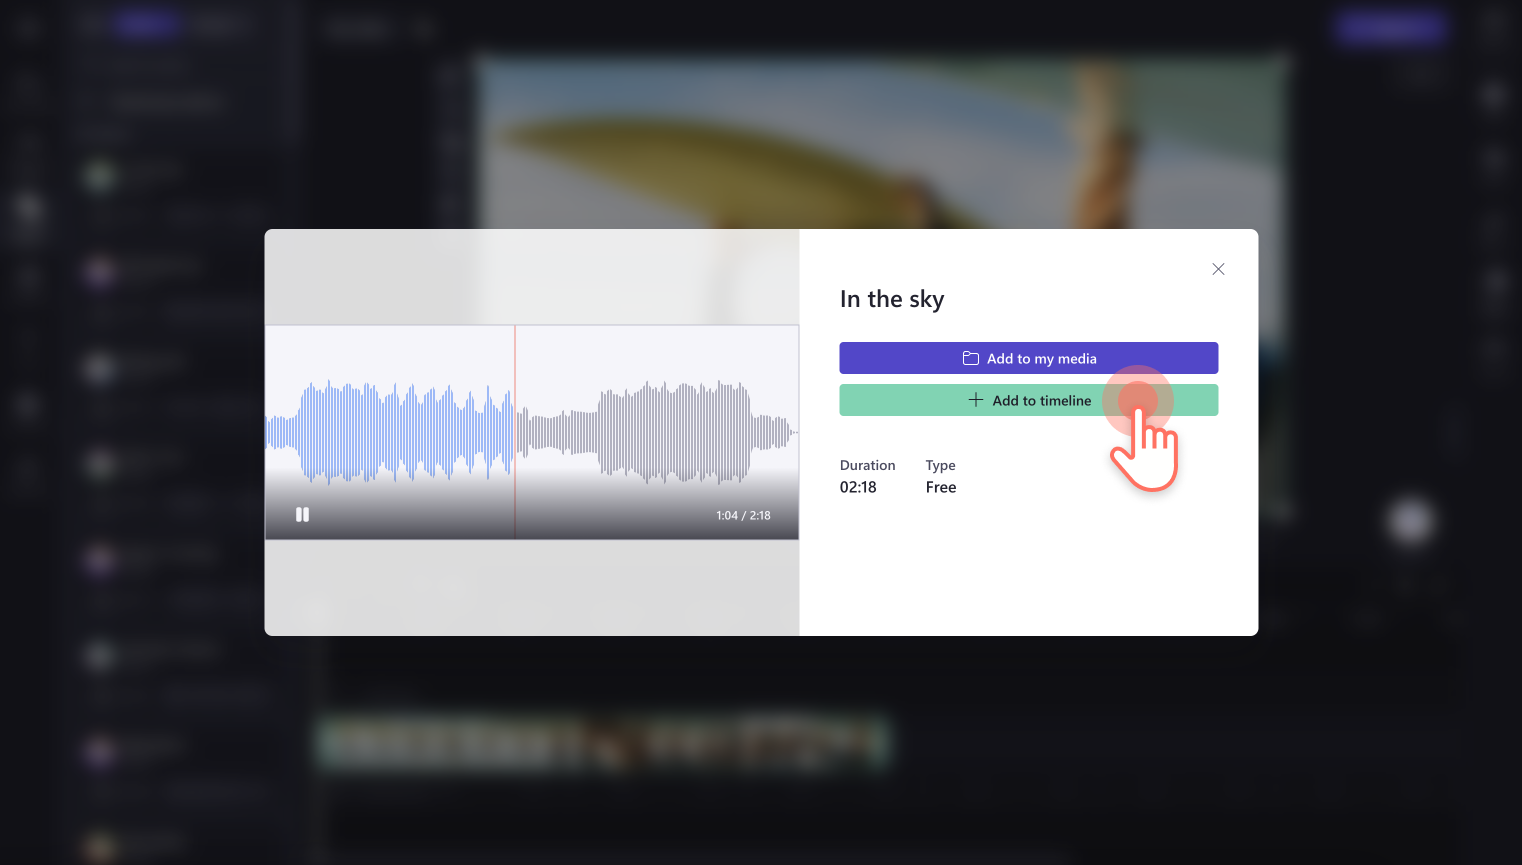
Drag and drop your chosen audio file onto the timeline below your video if you clicked on the add to my media button.
Step 3. Edit your royalty-free music track
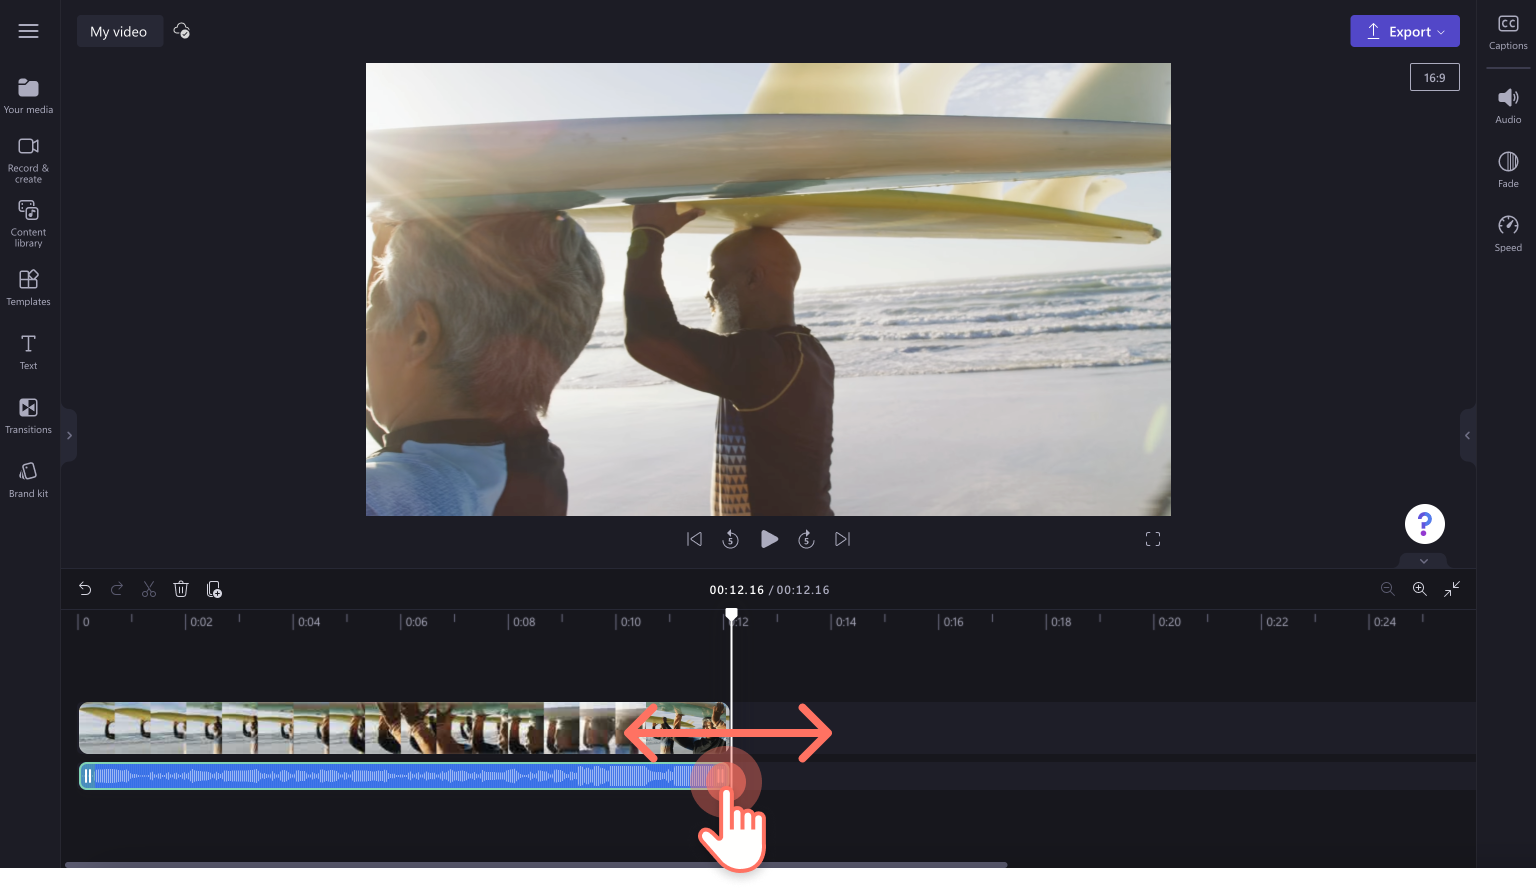
To trim your audio, click on the audio file on the timeline so it's highlighted green. Move the green handles to the left of the timeline to trim the music length. If you trim too much footage off your music, just drag the green handle back to the right to recover your tune.
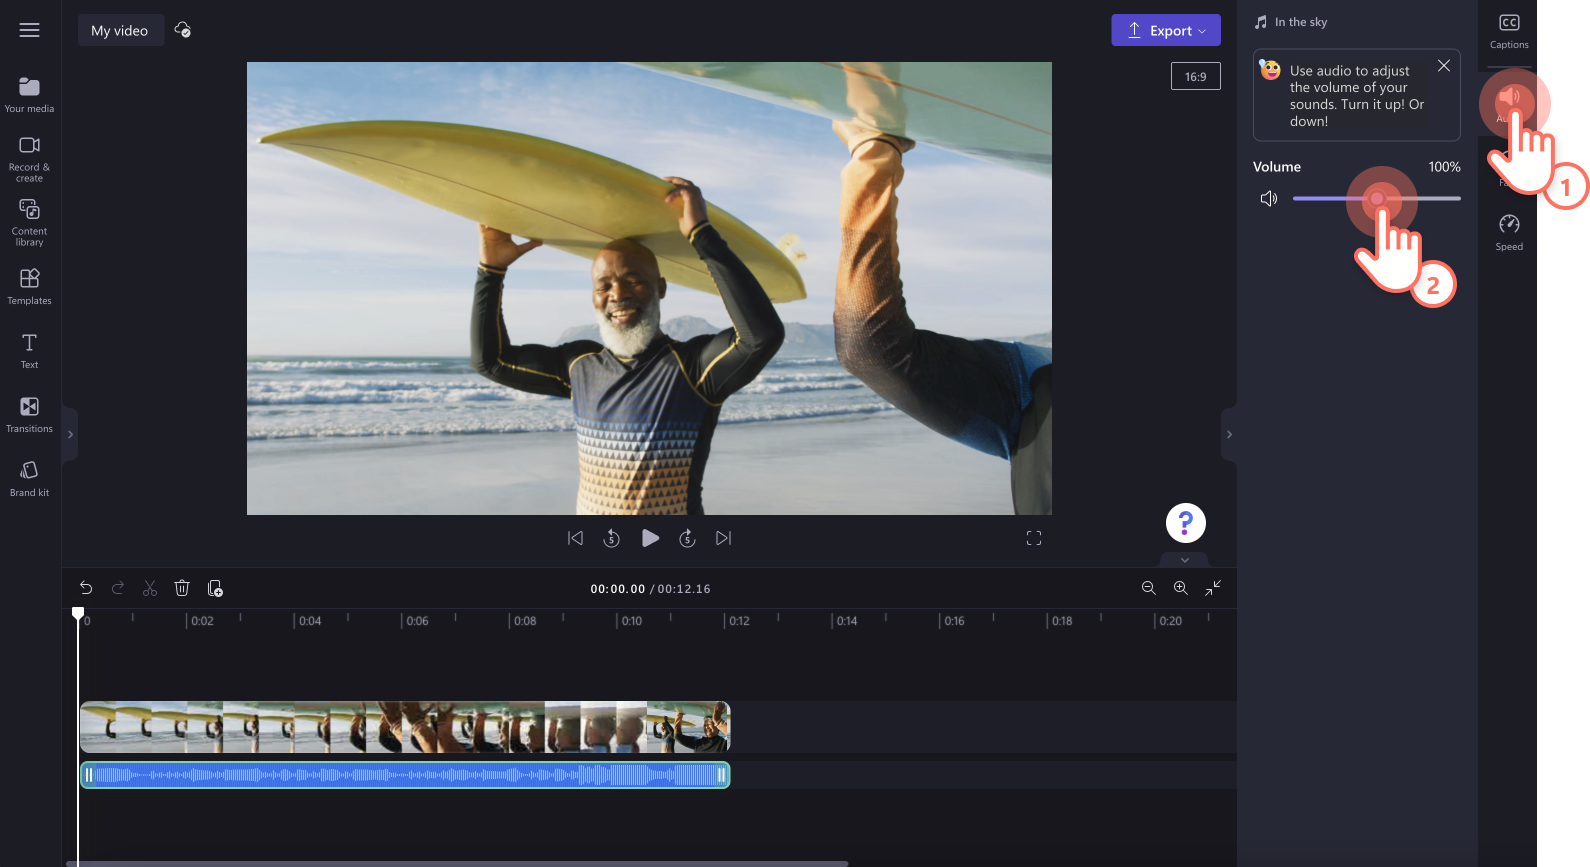
To edit the volume of your music, click on the audio tab on the property panel. Use the volume slider to make your audio softer or louder. Drag to the left for softer and right for louder.
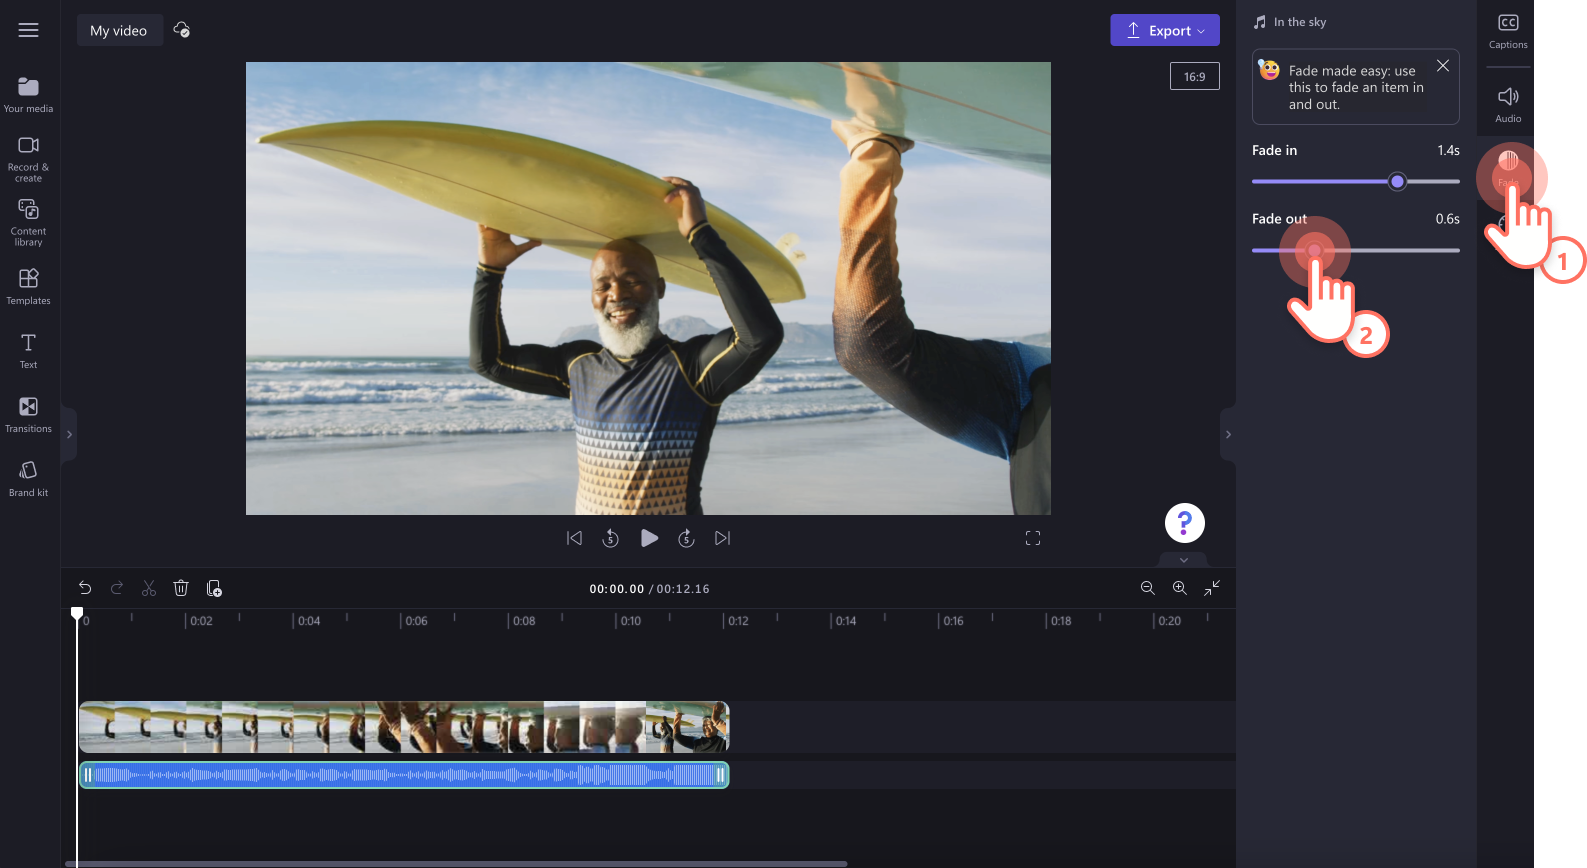
To add fades to your music, click on the fade tab on the property panel. Drag the fade in and fade out sliders to the right to add and increase the fade.
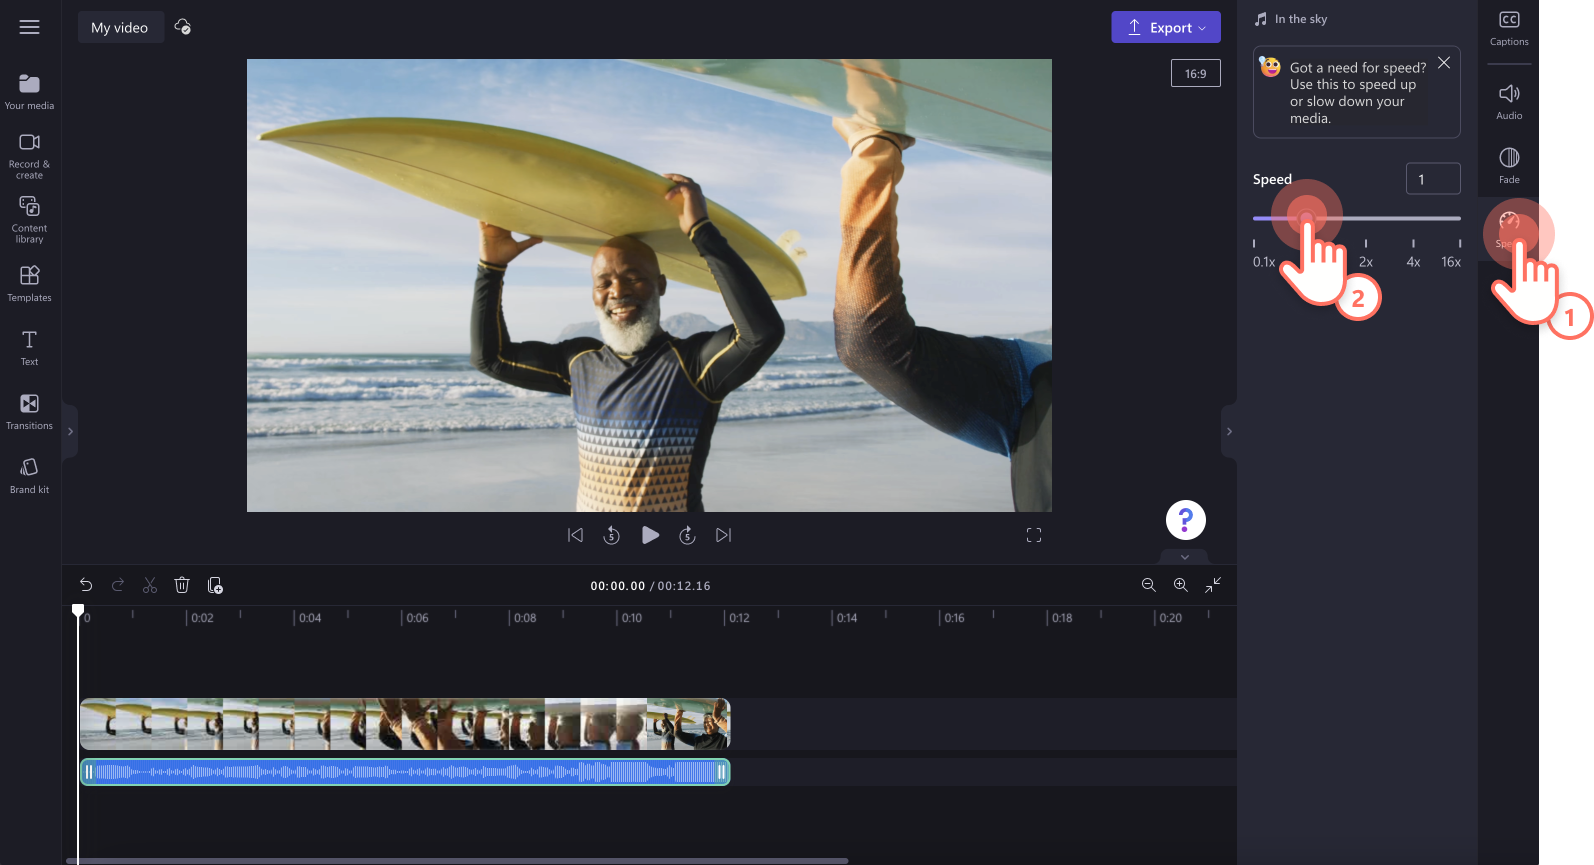
To edit the speed of your audio track, click on the speed tab on the property panel. Drag the slider to the left to slow down your clip, or to the right to speed up your clip. Choose from 0.1x to up to 16x speed options or input a specific value.
Step 4. Preview and save your video
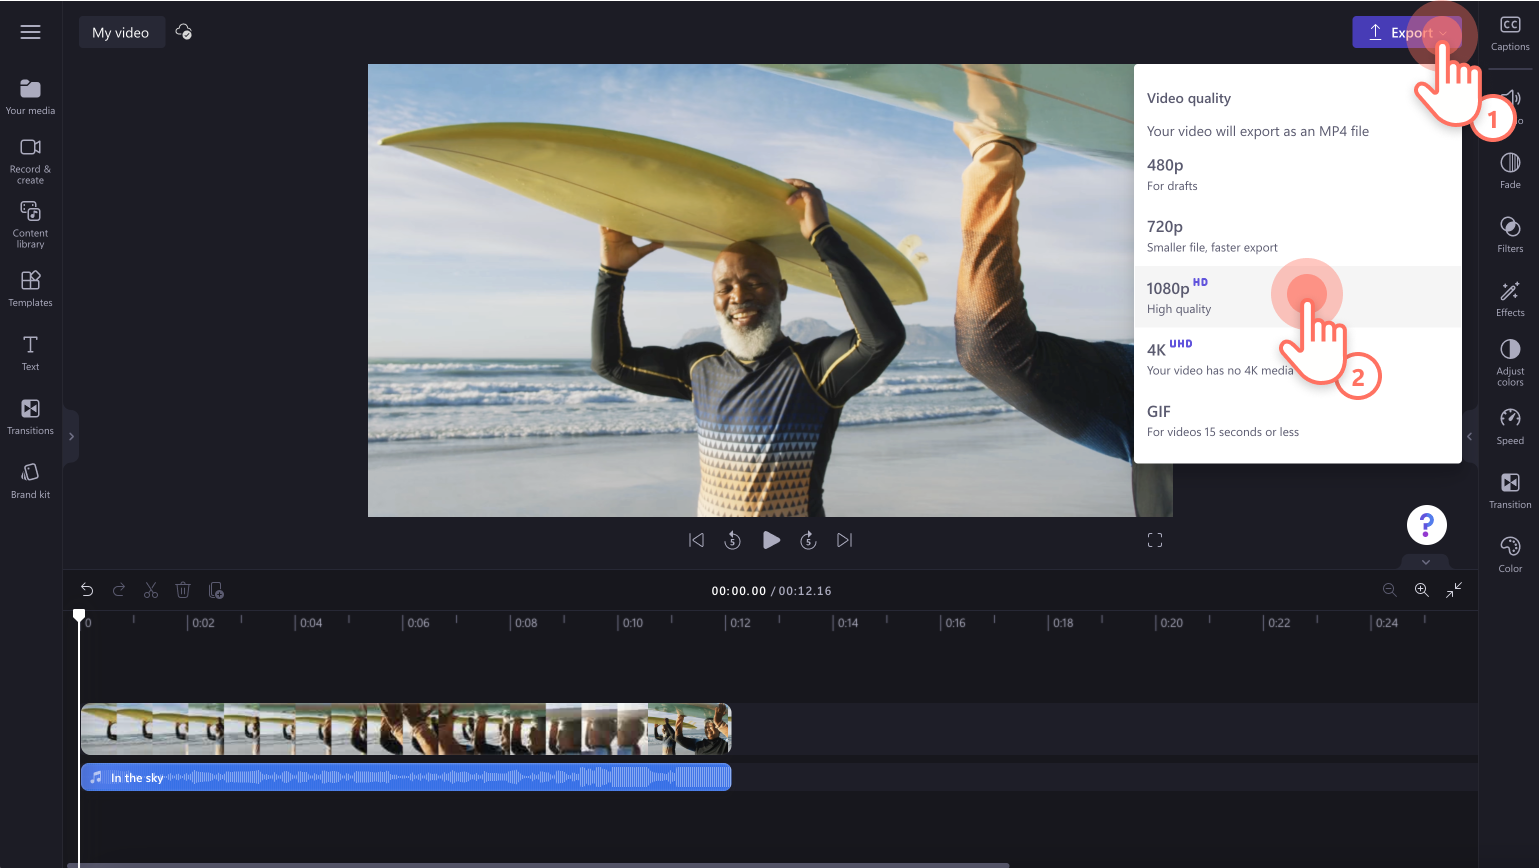
Before saving your new video, make sure to preview by clicking on the play button. When you’re ready to save, click on the export button and select a video resolution. We recommend saving all videos in 1080p video resolution for the best quality. Paid subscribers can save in 4K video resolution.
For more help adding stock audio to your video, check out our how-to tutorual.
Frequently asked questions
Can you be sued for royalty-free music?
Royalty-free music means you do not have to pay the artist who owns the song, as it is free to use. If you use someone's song without permission, you infringe on their copyright.
Is royalty-free music copyrighted?
Royalty-free means you don’t have to pay for royalties, but the copyright of the music is not yours. The copyright of the song remains owned by the artist.
Do I have to pay to use Clipchamp’s royalty-free music?
Clipchamp offers a free-to-use stock category of royalty-free music. A subscription fee applies if you want to access premium stock audio.
Further your audio editing skills with our free music visualizer tool, beginner-friendly audio editing hacks and explore how to separate audio from video in our useful blog.
Explore royalty-free music options today with Clipchamp for free or download the Clipchamp Windows app.
